Tuesday, April 29, 2008
The Waiting Game...

Monday, April 14, 2008
B-b-b-baa-bass!


We Be Jammin'


Saturday, April 12, 2008
The Green Light


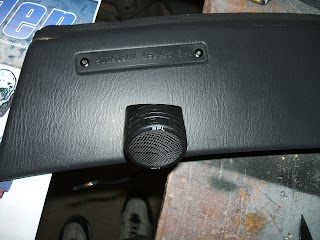
How Tweet it is...


Tuesday, April 8, 2008
One Project = More Projects...


PDA/GPS Install...

From the box, the PDA mount has a little spring lever that provides constant tension for the suction cup that holds the thing to the windshield. I tapped the pin out of the lever and removed that whole suction cup assembly so I could mount it directly to the pillar trim, as you can see in the above pic.
 I drilled a hole in the trim and used a nifty wall anchor to hold the PDA mount in place. I did have to hacksaw the length of the bolt, of course, to provide clearance once the pillar trim was snapped back into place. I thought this setup would be more secure with its distribution of weight, as opposed to just a nut screwed on the bolt.
 Then I cut a notch at the botom outside corner of the pillar trim. This is to allow the power cord and the audio cord to be out of sight and out of the way except for the portions that are in the PDA. I already had the two cords sticking through the dash before I put the pillar trim back on.
And, here's the finished result. Not what you'd call "trick", but it looks better than having it hang from the windshield and with cords strewn over the dash. I do want to find a couple 90-degree elbow adapters for the two cords so it pulls them out of view a little more--especially that power cord on the bottom.

Roof: Part 2

Then, it was time for the Bondo. I put an initial base layer of filler over the affected areas. I sanded, then added a bit more where there were low spots. Sanded again, and then hit a couple of other obvious spots one time more.


Now, my approach to the roof was a little different than what other people would have done. Ideally, the whole front section would have been stripped down to metal and a larger area hit with a thin layer of Bondo, followed by a lot of sanding and smoothing and repeated process. However, my plan for the roof was different than a traditional smooth and paint to match job. I wanted to add a utility/off-road touch to the car by covering the roof with a tough, durable truck bed liner. Weird, I know. I haul mountain bikes a lot on the roof, and am constantly laying things on the roof, so I wanted to go this route. With the factory roof rack lines that were black and separated the roof from the rest of the car, I thought it might work. And, as a bonus, it would cover many of the small imperfections that would have taken hours and hours to work out. If not for the fact that I'm putting a bicycle carrier on the roof rack, I probably would not have gone this route. Hard to tell how it will look until the car is finished, with the complete rack setup installed.


Roof Work

I cut the beams into pieces that fit the strip that needed reinforced, then flattened the ends to help them fit into place between the roof beams in Project Green. Then, I wedged them in place and positioned them where needed. The first beam and the windshield support beam had been gapped a little from the roof structure, and there didn't seem to be a way to bring the two together. Besides, this method offered the strucural rigidity under the damaged area that I wanted.

I was rather pleased with the finished product. It has a LOT of strength/support, and I thinkI could sit on that portion of the roof and not worry about those dents falling back in.

Finally, I hit the beams that were cut and installed with a seam sealer. This should seal things together and be similar to the factory stuff that's squirted in there at assembly.

Friday, March 28, 2008
GPS Update...Change of Plans Needed
That being said, I have been playing with the unit in my LSi wagon this week. I really like the setup. A maybe-cool thing about having the PDA located above the dash is that the PDA’s camera can shoot live video. Not sure when I’d need or want to shoot any driver’s-perspective video, but it’d be a possibility if I ever wanted to.
Sunday, March 23, 2008
Strip Club Fun...

It's so much fun to take somethin apart when you know you don't have to put any of it back together. :-)
Cradle Robber...

The body man who is going to be pulling the front end stopped by the garage to look at Project Green for the first time. He said the job would be much much easier if he had a good radiator cradle to weld in after pulling the subframe. He's the guy who pulled the front on my '95 LSi wagon a few years ago and had mentioned to my dad this weekend that I must like Subarus. He commented with a grin to me that my Impreza OBS looks like an AMC Pacer. I won't hold it against him, though, because he's a nice guy who does great body work...and he's probably right.


He suggested we drill out the spot welds on the donor car and pull it off that subframe. So, Dad and I soon begn drilling away at he spot welds. Man, there were a bunch of them. It soon grew into a one-man job, and dad is the one who actually did he grunt work to pull this thing off.

Three Generations...

New Windshield!!!!!


Hatch Swap!


Now, when you remove the hatches, you also must disconnect wiring harnesses on the passenger side and the washer fluid hose on the driver's side. They are not right at the top of th hatch, but rather deeper down in the car. The washer fluid hose will be black and will detach from a fitting that's on clear tubing that runs up the rest of the car.
And, here it is on Project Green:

(Don't forget to also switch over your lock if you ever do this...)