Saturday, May 17, 2008

On the Road


Well, Green is finally on the road, all fixed up (mostly) and legal (mostly). I'll have to say that the car is more fun to drive than I thought. Pretty peppy for a non-turbo 4-cylinder car, and of course the AWD system gles it to the road. There's a few curvy roads I look forward to trying out. I did notice a little more road noise and "feel" compared to y LSi wagon, but the cars are from two different levels, so that's to be expected. I will miss my leather seats, but the ones in Green will be fine, I think. I for sure need cruise control, so hopefully within month I can pull what I need off the donor car and get cruise working on Green. That's the joy of buying an older car: you're never finished little projects on it. But, as a whole, I suppose this is the completion of Project Green Machine...


Mini Tune-Up


Today I changed the oil in Green, replaced the air filter, and replaced the spark plugs. The plugs were Champion, so I know hey weren't the original set, but they did show some wear/age. I put NGK back in. I never had such a struggle with simple things as I did getting the plug wires out the heads on this thing. Anyway here's a few pics of the old plugs and of this handy spark plug starter tool I've had since my mom gave it to me way back during my freshman year at college.


Thursday, May 15, 2008

Green Light for Green...

Well, I got word last night that all the paperwork went through at Frankfort OK and that Green is ready to legally hit the pavement. I'm going to add it to my insurance policy tomorrow and start driving it on Saturday. I've got a few little things left to do, like finish the install of the roof rack fog lights, and then re-install the center console with the new fog light power switch. The mount tabs for the grille were mostly busted in the crash (both of them), so I'll have to secure the grille to the radiator support a little better too. Oh, and the wheel swap. I'm taking the alloy wheels off my 95 LSi wagon and putting those onto Green. I had hoped to buy some wheels for Green, but these will have to do until I find a decent deal on some. My Legacy rims will look much better than plastic wheel covers, though.

See you on the road!

Sunday, May 11, 2008

Almost There...

Well,Green is together...for the most part. There are still some little things to do, but hopefully the poilce inspection will happen this week and all the paperwork can be processed in Frankfort. If all goes well, I will be putting a license plate on Green this Saturday and driving down the highway. I did drive it around the road a little today, which was neat. I like the fit/feel of the car. It was a cold, windy, rainy day today, so this isn't the best photo. Hopefuly, I'll have better shots next week.


Almost there...


The weekend was a progressive one as far as getting Green to actually look like a car again. It felt great to see that it wouldn't be long until this project would soon be finished and on the road. The body work that my frame guy did was great! Most people would never be able to tell that this is a rebuilt vehicle by popping the hood.


Not Exactly a Match...


Well, the donor car was the exact same color/shade of green, but the two-tone turned out to be a different shade. This pic will show the difference. This would include the front bumper and the leftt fender. I have no plans as of now to re-paint. I will, however, pull off the pinstriping and replace with some that better matches what is on the rest of Green.

Undercover


One of the other accessories found in the 2000 OBS donor car was this nifty cargo cover. Also in the back was the rubber Impreza cargo mat. They look nice in their new home.


Light it up


The donor Impreza had a few more options than Green. One of the things I wanted was these nifty driving lights that were factory. I snagged the dash button, which already had the wiring clip in Green, so that was pretty simple. The actual wiring harness for the lights themselves had to be removed from the donor car and plugged into a clip that was at the left headlight plug. Rote the wires behind the bumper cover, mount the lights, and I'm good to go...


Timing is everything.


Well, Green was all straightened out, but after pulling back the radiator/fan assembly, it was discovered that the timing cover had been cracked/busted in a few places. So-off came the old cover, and I decided it was best to go ahead and replace the timing belt now, at 71k, than to wait 30k and have to get access to the thing all over again. It was already opened, so why not change it...


Tuesday, April 29, 2008

The Waiting Game...

Last week, Green was hauled over to the frame shop and is currently awaiting the next big step in the rebuild process. Hopefully, it will be pulled and back home within another week, depending on how busy the frame guy is. After that, the car is pretty close to getting on the road. I still have to swap steering wheels, hook up the fog lights, and finish up some little interior things, but hopefully it can get the sherriff's inspection quickly and get my paperwork to Frankfort for the rebuilt title. Then...I can finally hit the road and take a spin in Green.

Monday, April 14, 2008

B-b-b-baa-bass!


Well, I picked up a slightly used amp for next to nothing, so I thought it'd be fun to put a subwoofer in Green. I bought a 12" from Wally-World for just under $40, and so I have $50 invested in the getup. Not the most high quality, name brand equipment, but I think it will work just fine for what I want. I wanted the ability to remotely turn the thing off and on from the diver's seat with a quick flip of a switch, so I installed a switch on the dash. This way, I can easily de-sub the sound if so desired. Duing the initial install, all was well. I made sure everything worked, then installed most of the interior in the car. A little while later--burzzzaap! It blew a fuse...and another. Grrrrr. I had to wait until this Saturday to take a look at things. Turns out a part of the power line was smashed under a mounting clip for the side trim at the headliner. Fixed easily enough.


Time to move on. I came up with a sub box to fit in the driver's side of the hatch. I kept it close to the specs listed on the box, but just a smidge smaller in depth. I wanted it at the side and so the retractable cargo cover would conceal it.


The pressed word I used for the box came from a discarded desk, so the cost for this part of the project was nada. The cost for the upholstry was $6 from Wal-Mart. 3 yards. My dad already had some leftover upholstry adhesive, so I snagged that for free as well. The desk wood probably worked better than new pressed wood because the snazzy wood grain finish was a better surface for the spray adhesive.


I tried to run the wires for the amp as clean as possible. I think I achieved that. With the sub box removed, you can easily tuck the power cords and the RCA cables away cleanly or completely. The ground wire is the only one that doesn't hide away as easily, but no biggie. For the cheap investment placed into this thing, I think it sounds pretty good. It goes boom and rattles the trim. Not the deepest or the loudest or the cleanest bass on the block, but it sounds good enough for me. A guy in his 30s probably doesn't need a car with super bass anyway...

We Be Jammin'

OK--When I installed the mounting arm for my PDA on the pillar trim, I ran the wires through the bottom of the trim and under the dash. My new CD player has an input jax for AUX devices. Thing is, I didn't want some cord draping across the front of the dash. So, I drilled a hole in the back f the little storage tray that is mounted just below the CD player and ran the audio cord from the PDA through it, providing a nice, clean, minimal look.


Saturday, April 12, 2008

The Green Light


I wanted to do a little something to the hatch area in the way of lighting. Origionally, I wanted to put these little green lights at the top, but didn't really see a good place to locate them. So, I went for these side panels at the rear. The effect is nice but subtle. I wired these directly into the factory wiring for the dome light.


How Tweet it is...

My current ride, '95 LSi wagon, had the factory Sube premium sound, part of which is a pair of tweeters. The factory system in this Impreza seems pretty anemic. I knew the factory tape deck had to get yanked. I knew I wanted a sub in the back and an amp. I knew at least the front door speakers would need an upgrade. And, I knew I wanted to install some tweeters. I picked these up for $9 at a little audio shop and they sound good. Here's how I installed them on the dash.


Tuesday, April 8, 2008

One Project = More Projects...


With deployed airbags, you obviously have to do some tearing apart of your dash. This past weekend I successfully took out the old passenger side airbag and put in the "new" one from the donr car. (Sensors had been replaced the previous week.) I also replaced the airbag control unit. (Yellow cables anywhere mean airbag wiring.) Haven't attempted the steering wheel swap yet.


Well, since I had the dash apart...and since I had the headliner down and all the side trim loose or off (to work on the roof)...I thought I might as well do some sound upgrades. I thought about a factory Sube CD player, but I'd need a tape/CD combo in order to use the PDA sometimes. Plus, a used unit has little or no warranty, so I ended up finding an affordable stereo at Target that like the "feel" of. I picked up a wiring harness adapter a couple days later, and that made the install better. I also ran wires for the PDA unit, in addition to a power wire from battery to dash switch for an amp to be in the back with a 12" subwoofer. And, a power cord from battery to dash switch for a sleek pair of fog/driving lights I plan to mount on the front crossbar of my bike roof rack. You have the dash ripped apart, might as well get multiple things accomplised at once so you don't have to tear it apart again later.


Or so I thought...Grrrrrr. I had my sub and amp hooked up and playing music for a couple hours. Wanted to make sure it all worked before I put the interior back together. So, obviously, a little later--after headliner, trim, and dash were mostly back in order, the amp power lead starts blowing fuses. I have no idea what would make it start doing that suddenly. Maybe when I snapped all the side trim back in place I pinched the power wire that runs to the back of the car. I dunno, but it was pretty stinking frustrating. So, I may have to tear some of the interior apart again...

PDA/GPS Install...

Well, I gave up on the idea of a sleek, custom install of my PDA/GPS combo. I was excited about the possibility of placing it within the center console--had it all figured out--but then a "test run" in my Legacy revealed that the angle of the PDA would provide one gnarly glare on the screen at most points during sunshine. So, I opted away from that and decided to rig something using the production PDA mount...the one every joe-schmo uses. So much for uniqueness. But, I did "custom" it a tad by mounting the PDA holder to the driver's side windshield pillar, running the power and an audio cords behind the dash, so that at least that provids a clean look.


From the box, the PDA mount has a little spring lever that provides constant tension for the suction cup that holds the thing to the windshield. I tapped the pin out of the lever and removed that whole suction cup assembly so I could mount it directly to the pillar trim, as you can see in the above pic.

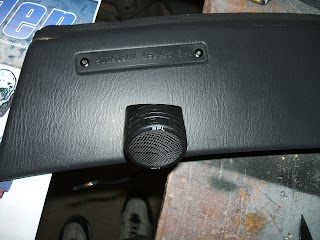
I drilled a hole in the trim and used a nifty wall anchor to hold the PDA mount in place. I did have to hacksaw the length of the bolt, of course, to provide clearance once the pillar trim was snapped back into place. I thought this setup would be more secure with its distribution of weight, as opposed to just a nut screwed on the bolt.


Then I cut a notch at the botom outside corner of the pillar trim. This is to allow the power cord and the audio cord to be out of sight and out of the way except for the portions that are in the PDA. I already had the two cords sticking through the dash before I put the pillar trim back on.


And, here's the finished result. Not what you'd call "trick", but it looks better than having it hang from the windshield and with cords strewn over the dash. I do want to find a couple 90-degree elbow adapters for the two cords so it pulls them out of view a little more--especially that power cord on the bottom.


Roof: Part 2


Next, it was time to work onthe top of the roof. A dent or two isn't that bad to fix with Bondo. Time consuming, but not all that bad. This was more than a couple of dents. I took the roof down to bare metal so I could work on those dinged and dimpled and wavy spots up front.


Then, it was time for the Bondo. I put an initial base layer of filler over the affected areas. I sanded, then added a bit more where there were low spots. Sanded again, and then hit a couple of other obvious spots one time more.


Now, my approach to the roof was a little different than what other people would have done. Ideally, the whole front section would have been stripped down to metal and a larger area hit with a thin layer of Bondo, followed by a lot of sanding and smoothing and repeated process. However, my plan for the roof was different than a traditional smooth and paint to match job. I wanted to add a utility/off-road touch to the car by covering the roof with a tough, durable truck bed liner. Weird, I know. I haul mountain bikes a lot on the roof, and am constantly laying things on the roof, so I wanted to go this route. With the factory roof rack lines that were black and separated the roof from the rest of the car, I thought it might work. And, as a bonus, it would cover many of the small imperfections that would have taken hours and hours to work out. If not for the fact that I'm putting a bicycle carrier on the roof rack, I probably would not have gone this route. Hard to tell how it will look until the car is finished, with the complete rack setup installed.


Roof Work

Well, I think of all the damage to Green, the roof is probably the worst to have to work on. I don't know anything about the accident that got this car to the salvage auction, but the way the roof was damaged, I wonder if a deer or something was hit and then bounced off the roof. Regardless, there was some nasty denting that took place. A pro would have cut the top off the car and welded a clean one in its place. I'm not a pro (no welding skills whatsoever), and the project would have quickly left the "budget project" zone had I paid someone to cut and weld a new top on it.


So--the first issue to address was the couple of bigger dents in the roof. BURMP--just pop 'em out and the dents are gone, right? Nope. Once dented like that, the damage has a memory effect, and before you know it the dents would return to their inward status. So, I pushed out the dents, and then reinforced the roof by using the support beams from the parts Impreza.


I cut the beams into pieces that fit the strip that needed reinforced, then flattened the ends to help them fit into place between the roof beams in Project Green. Then, I wedged them in place and positioned them where needed. The first beam and the windshield support beam had been gapped a little from the roof structure, and there didn't seem to be a way to bring the two together. Besides, this method offered the strucural rigidity under the damaged area that I wanted.


I was rather pleased with the finished product. It has a LOT of strength/support, and I thinkI could sit on that portion of the roof and not worry about those dents falling back in.


Finally, I hit the beams that were cut and installed with a seam sealer. This should seal things together and be similar to the factory stuff that's squirted in there at assembly.


Friday, March 28, 2008

GPS Update...Change of Plans Needed

Well, I was excited about the console placement of the PDA/GPS unit, but while doing some around town experimentation, I discovered that a combination of the low placement and tilted angle of the PDA, a bad glare on bright days would pose a serious hindrance. So, I may be forced to use the included mounting arm/bracket. I’m going to look at the possibilities of modifying the actual PDA holder to mounting directly to the pillar. I want something that looks clean, and after I hook up power and audio cords, a regular holder to windshield install would look cluttered. Attached directly to the pillar, I can drill a simple hole in the plastic trim and conceal most of the wires.

That being said, I have been playing with the unit in my LSi wagon this week. I really like the setup. A maybe-cool thing about having the PDA located above the dash is that the PDA’s camera can shoot live video. Not sure when I’d need or want to shoot any driver’s-perspective video, but it’d be a possibility if I ever wanted to.

Sunday, March 23, 2008

Strip Club Fun...

If you own an Impreza, this is what they look like naked.


It's so much fun to take somethin apart when you know you don't have to put any of it back together. :-)